Tile And Grout Cleaning Mistakes That Could Be Ruining Your Floors
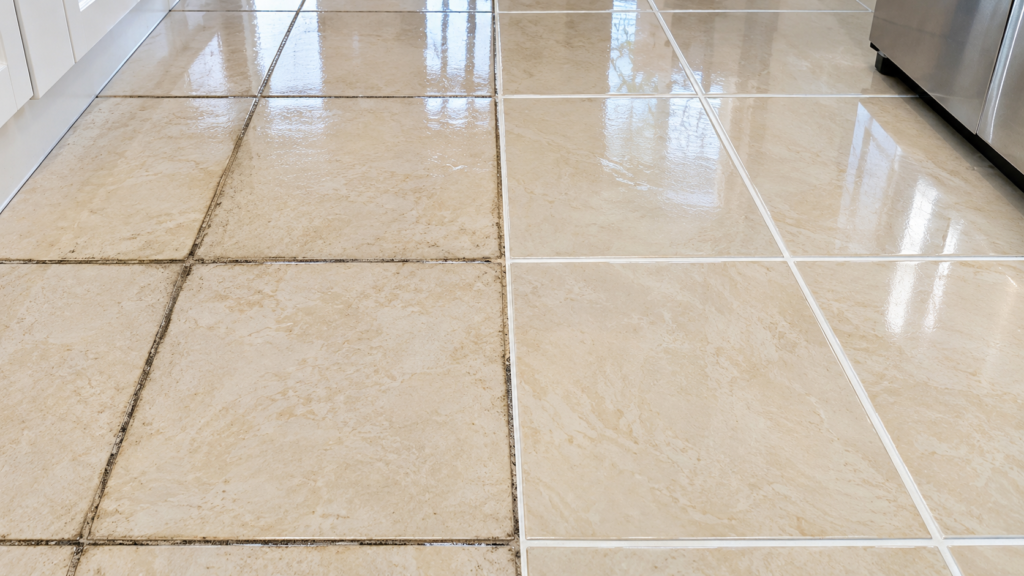
You mop the last corner, wring out the mop and stand back. The tiles are wet and shining. Kettle on.
For optimal results, consider professional Tile And Grout Cleaning services.
Then the floor dries.
There’s a cloudy film across the tiles. The grout looks greyer than it did this morning. That stain by the cooker is exactly where you left it, and after all that scrubbing you’d think it could at least have the decency to fade a bit. It’s like it’s mocking you.
It happens at work too. A shop floor gets mopped before opening, and by half nine there are smear marks all the way from the door to the till.
More often than you’d expect, the cleaning itself is the cause. Too much detergent will do it. So will a product that doesn’t suit the floor, or a brush that’s rougher than the tile can take. To prevent issues, regular Tile And Grout Cleaning is recommended. Some of these mistakes only cost you a Saturday. Others leave damage that no mop will ever get out.
Essential Tips for Effective Tile And Grout Cleaning
First, Know What You Are Actually Cleaning
A tiled floor is several materials sitting side by side. You’ve got the tile, the grout, usually a bead of silicone round the edges, and sometimes a sealer or coating on top. Each reacts differently to the same bottle of cleaner.
Take the tile first. Most ceramic tiles have a glazed face that shrugs off nearly everything. The glaze stops at the edge, though, and the grout next to it has no protection at all. Porcelain is tougher still. Mind you, a polished porcelain floor shows every scuff and streak, and a textured one has thousands of tiny pits where dirt settles and stays.
Quarry tiles and terracotta are unglazed, so they soak things up unless somebody has sealed them. In an older house they may be carrying decades of wax, polish and sealer from four or five different owners. You won’t know which until you test a corner.
Natural stone is where the expensive mistakes get made. Marble, limestone and travertine are damaged by acid, and that includes mild household acids like vinegar and lemon juice. Granite copes far better, but the sealer on it and any resin filler in it may not.
Look at the finish as well. Polished stone is glossy. Honed stone has a soft, matt look, so if your honed limestone isn’t gleaming like a hotel lobby, don’t worry. It was never meant to.
Then there’s the grout. The ordinary kind is cement-based and full of tiny pores, and that’s why it stains so easily. Epoxy grout is a resin that absorbs next to nothing. And the soft, rubbery line round the bath isn’t grout at all. That’s silicone, and a stiff brush will pull old silicone clean off the wall.
One Cleaner Cannot Suit Every Tile
The all-purpose spray under the sink does a decent job on worktops and cupboard doors, so of course people use it on the floor as well. Whether that works comes down to two questions. Is it strong enough to lift the dirt? And is it gentle enough for whatever the floor is made of? Plenty of products pass the first test and fail the second.
Lots of homes have porcelain in the kitchen and limestone in the hall. A limescale remover that does no harm to the porcelain will etch the limestone the first time it’s used. Offices have the same split, with stone in reception and ceramic in the washrooms. One bottle for the whole building is convenient, and it’s usually the reception floor that pays for it.
Even with one kind of tile, it helps to work out what sort of mark you’re looking at. A dull patch on marble after an acidic cleaner is etching, which means the surface itself has been eaten into. Fine scratches in a glaze are permanent too. A cloudy film left by detergent is the best of the three to have, because it’s only sitting on top and will rinse off.
For the weekly clean, use a pH-neutral floor cleaner that says on the label it’s safe for your tile and your grout. Keep the alkaline degreasers and acidic descalers for particular jobs on floors you know can take them.
If you look after a building, write down which product goes on which floor. Cleaning routines get passed from one contractor to the next without anybody checking them, and “it’s tiled, it’ll be fine” has ruined a fair few stone floors.
Why Vinegar And Acid Can Damage Cement Grout
Vinegar gets recommended for everything. It descales the kettle and shifts the crust round the taps, so sooner or later someone tells you to try it on the grout.
White vinegar is roughly 5% acetic acid. Cement grout is alkaline, and acid dissolves the cement that holds it together. One wipe won’t do much. Use it every week, though, and the joints slowly turn rougher and more porous. The sneaky part is that the grout looks better at first, because the acid strips off the dirty top layer and takes a little of the grout with it.
On marble, limestone and travertine the damage is worse and it comes quicker. Those stones are mostly calcium carbonate, the same stuff as the limescale vinegar is so good at dissolving. A homemade vinegar-and-lemon mix can leave dull, etched patches within minutes, and no amount of washing brings the polish back. A bad case means paying a stone restorer to re-polish the surface.
That doesn’t put acid off-limits. An acidic cleaner is the right tool for the cement haze left after tiling and for heavy limescale, as long as the tile and grout can tolerate it. These are specialist products, and their dilution and rinsing instructions need following to the letter.
Before you open one, check four things: the tile, the grout, any sealer on the floor, and the metal nearby, since strong acids mark chrome trims and steel drain covers.
Bleach Is Not A Shortcut To Clean Grout
Bleach lightens stains, and a lighter stain can still be sitting in a dirty joint. Grout lines fill up with cooking grease, soap scum, dust and whatever comes in on people’s shoes. Bleach takes the colour out of that layer without lifting much of it. You end up with paler grout that still has most of the muck in it, ready to welcome the next lot of dirt.
People also treat cleaning and disinfecting as one job. They’re two. Cleaning removes dirt. Disinfecting kills germs, and it only works properly on a surface that’s already clean, with the product left on for the contact time printed on the label. Grubby bathroom grout needs cleaning. It rarely needs disinfecting.
Now, before you throw the bleach out, it does have proper uses. Black mould on white grout or shower silicone is one of them. The trouble starts when it goes on every tiled floor in the house.
On coloured grout it can take the pigment out unevenly, so you swap a dirty joint for a blotchy one. It can damage some sealers and stone finishes. And if it’s left sitting, it corrodes metal, stainless steel included.
You don’t want to give up a whole Saturday to brightening the bathroom grout, only to find on Sunday morning that the charcoal grey has gone patchy.
So read the label, and try the product on one hidden joint before you do the room. Don’t go by your neighbour’s bathroom either. The chances are they have different grout.
One rule here has no exceptions. Never mix bleach with anything except water. Bleach with vinegar, limescale remover or any other acid gives off chlorine gas. Bleach with ammonia gives off chloramine. In a small bathroom with the door shut, either one can put you in A&E. Even using one product straight after another can do it if the first hasn’t been rinsed away. Open a window, wear gloves and rinse between products.
Still staring at dark grout lines after a proper clean?
Work out why before you buy something stronger. There are five usual suspects: dirt deep in the pores, a permanent stain, mould, grout that was always that colour, and grout that’s breaking down. Each needs a different answer, and for a couple of them cleaning products are money down the drain. If a joint won’t lighten whatever you try, get a professional to look at it. That costs less than a cupboard full of bottles that were never going to work.
When Elbow Grease Goes Too Far
Ten minutes into scrubbing the same patch, most of us reach for a harder brush and lean on it.
Surely something has to give.
Unfortunately, that something might be your tiles or grout.
Wire brushes scratch. So do green scouring pads, and so do the cream and powder cleaners with grit in them. Once a glaze or a polished surface is scratched, it stays scratched. A rotary floor machine does the same damage a good deal faster. The wrong pad, too much weight on the handle or a few seconds too long in one spot can strip a sealer or grind the grout down.
Old silicone and crumbling grout stand no chance. They can barely hold themselves together as it is.
Going gentler nearly always cleans better. A good cleaner does most of the work if you leave it on the floor for the time the label says, and most people wipe it off far too soon. Start with a soft nylon brush or a white non-scratch pad. Try a small patch somewhere out of sight, and don’t judge it until it’s dry.
Keep an eye on the floor while you work. Sandy grains coming out of the grout, a tile losing its shine, joints getting deeper as you go. Any of those means you’ve gone through the dirt and started on the floor, so stop.
Textured commercial tiles tempt people into the same mistake with a machine. Anti-slip tiles in kitchens and entrances have a rough profile, and a flat pad just skates across the top of it. The usual response is to crank up the pressure. A brush that gets down into the texture will do far more, especially with a wet vacuum behind it to pick up what it loosens.
Don’t forget the kit itself. A soft pad with grit trapped in it is sandpaper. A brush can catch on a raised tile edge and chip it. With any machine you haven’t used before, try it somewhere discreet on its gentlest setting, and only turn it up if the floor is coping.
The Grit You Forgot To Remove
The floor doesn’t look that bad, so you fill the bucket and start mopping. After all, how dirty can it be?
Quite dirty, actually.
Think about a shop entrance on a rainy morning. Every customer brings in a little souvenir from the pavement: sand, mud, grit, bits of leaf. By lunchtime it has worked its way into the texture of the tiles, along the skirting boards and into the corners by the door. From where you’re standing the floor still looks fine.
Then the water goes on and all that grit turns to mud. The mop picks some of it up and spreads the rest into the grout lines. You’ve essentially turned a straightforward cleaning job into a game of chase-the-dirt, and nobody wins at that. It gets worse, too, because grit dragged along under a mop scratches the tiles as it goes.
So vacuum or sweep first, every single time. Go along the edges, behind the doors and under the furniture, and give textured tiles a bit longer than smooth ones.
At a busy entrance you can go one better and stop the dirt at the door. A decent entrance mat takes a surprising amount off people’s shoes, provided it’s long enough for them to take a few steps on it. A mat that people cross in one stride does very little. It needs vacuuming often as well, because a full mat stops collecting dirt and starts handing it back.
The Trouble With Too Much Detergent
If one capful is good, two must be better. Nearly everybody thinks this at some point, and it’s behind a great many cloudy floors.
Floor cleaners are made to work at a set strength. Go over it and the extra doesn’t clean anything. It dries on the tile as a thin, slightly tacky film, and dust and shoe dirt stick to it. The floor shows footprints an hour after you’ve mopped. It feels sticky under your shoes, or oddly slippery when it’s damp. And because every wash adds a little more, it can be weeks before you notice anything’s wrong.
At home that’s annoying. In a reception area or a shop it’s a safety problem, because a film of residue changes how much grip the floor has.
So read the dilution on the label and measure it out. Don’t just wing it from the size of the bucket. Some concentrates need very little, and you may find a single capful is meant for a whole bucket. Contact time matters too. Some cleaners need a few minutes on the floor to work, but they shouldn’t be left to dry there. And check whether your product needs rinsing off. The words “no rinse” on the front of a bottle often apply to the weakest dilution only, so read the small print on the back.
If the floor already has a film on it, another generous dose of detergent will only add to it. What gets it off is rinsing. Use clean warm water and a clean mop, and change the water often. Do a small area first, let it dry and see whether the haze has gone before you tackle the rest.
The Dirty Water Problem
Halfway through a big floor, the water in the bucket looks more like weak coffee than cleaning solution. You can carry on mopping with it, of course. But from that point you’re mostly moving dirt from one tile to the next.
Detergent loosens grease and fine dirt and holds them in the water, and that water then has to leave the floor. A mop loaded with dirty water lays a thin coat of it back down everywhere it goes. Grout sits a millimetre or so lower than the tiles, so that’s where the dirty water runs to, and that’s where it dries. The tiles come up clean and the grout goes grey. Big kitchen floors, canteens and shop aisles get it worst, because whoever’s mopping covers a lot of ground between water changes.
The cure is dull, but it works. Clean the floor in sections. Change the water once you can’t see the bottom of the bucket. Better still, use two buckets, one with the cleaning solution and one for rinsing out the mop, so the dirt ends up in the rinse bucket. And if the product needs a final rinse, do it with fresh water. The grey stuff left over from the wash doesn’t count.
For heavy dirt, extraction beats mopping. A wet vacuum or a professional extraction machine sucks the dirty solution up off the floor and out of the grout lines, where a mop can only soak up what it touches. That’s the main reason a professional deep clean gets a result you couldn’t, and their chemicals are often much the same as yours.
Next time the grout looks dark after what felt like a thorough wash, remember you may be looking at this morning’s mop water.
Flooding Cracks And Edges
Tiles cope with water. That doesn’t make a tiled floor waterproof, although plenty of people treat it as if it were. Cracked grout, a gap at a door threshold or perished silicone will let water through to the adhesive and the floor underneath, and it can sit there for weeks without you knowing. Slosh a bucket over a floor like that and you’re putting water exactly where it does harm.
Showers catch a lot of people out here. In a properly built shower, the thing keeping water out of the wall and floor is the tanking, a waterproof layer behind and under the tiles. Grout was never meant to do that job. So take it seriously if a tile has come loose at the shower entrance, if water turns up outside the enclosure, or if one joint is still dark hours after everything round it has dried.
Some damp has nothing to do with mopping at all. Older ground floors laid without a damp-proof membrane can draw moisture up from the ground below. It shows as patches that always look damp, or as a white powdery bloom on the tiles. Throwing more water at it won’t fix it. Equally, one stained grout line isn’t proof of a leak. Look at where the marks are, how long they’ve been there and whether they change with the weather before you decide.
On any floor with damaged joints, use a well-wrung mop and pick up standing water straight away. If the joints are open, the tiles rock underfoot or the damp keeps coming back, put the deep clean on hold and get a tiler or a damp specialist in to look. Clean it after the repair.
Sealer Cannot Fix Everything
Sealing sounds wonderfully final. Brush it on once, the thinking goes, and the grout stays clean for good. It doesn’t work like that. What a sealer does is buy you time to wipe up a spill before it soaks in. You still have to clean the floor, and no sealer will mend cracked grout or cure a leaking shower.
Cement grout usually does benefit from a penetrating sealer, and it earns its keep in kitchens, where spills happen daily. Epoxy grout doesn’t need one. Nor does glazed ceramic, or most porcelain. Sealer put on those tends to sit on the surface and dry in patches, and then it becomes a cleaning problem of its own. On a polished tile it can change the look of the floor and the grip as well.
Sealers come in two families. Penetrating sealers, also called impregnators, soak into porous material and work from inside it, so the surface looks much as it did before. Topical coatings form a layer on top. That layer changes the sheen, wears through where people walk most, and sooner or later has to be stripped and put down again. An impregnator makes stone and grout more resistant to stains. Nothing on the market makes them stain-proof, whatever it says on the tin.
Never seal over dirt in the hope of hiding it. You’d be locking it in. Clean the floor first and let it dry right through, which for grout can mean leaving it until the next day. Find out what’s been put on the floor before, then check the new product suits both the tile and the grout. A floor that keeps going damp needs that sorting out before anything goes on top of it.
As for when to reseal, let the floor tell you. Put a few drops of water on the grout. If they bead up, the sealer is still working. If they soak in and leave a dark spot, it’s time.
When Cleaning Turns Into A Repair Job
Some damage looks like dirt at first glance. Take a pale patch on dark grout. It could be detergent residue, a mineral deposit, faded pigment, or a spot where the grout itself has worn away. Only the first two will clean off, and the last one wants a tiler.
Residue changes when you rinse it properly. An etched stone tile stays dull however clean it is. A scratched glaze won’t come back with a stronger detergent. Crumbling joints, gaps at a threshold, and tiles that sound hollow when you tap them or shift when you stand on them all need a tiler to assess. Discolouration that’s still there after a good clean is the least worrying of the lot. Usually it’s only a matter of looks, and the floor underneath is perfectly sound.
White deposits take a bit more patience. Efflorescence is what you get when moisture carries salts up through the floor and leaves them on the surface as it evaporates. You can brush it off and it’ll be back before long, and it will keep coming back until the moisture stops. But a white film can also be leftover detergent, grout haze from when the floor was laid, or a coating that’s starting to fail, so don’t assume.
Be wary of any floor that only looks good when it’s wet. Water fills in fine scratches and makes a dulled surface look polished, and the effect lasts exactly as long as the water does. Judge every test patch dry, and in daylight if you can. If the mark hasn’t changed, more scrubbing won’t shift it.
A competent cleaner should be willing to say, “This needs a tiler,” or to send you to a stone restorer. Sure, that’s less satisfying than the promise of a dramatic transformation. But you’d rather hear that than pay for repeated treatments that can’t repair the defect.
Commercial Tile And Grout Cleaning
Effective Tile And Grout Cleaning Techniques
A badly cleaned bathroom floor at home is frustrating. In a restaurant, shop, hotel or office, the same mistake can put a customer or a member of staff on their back.
Start with the products. A single site can have four or five different floors. Some are sealed and some aren’t, and the grout ranges from last year’s to thirty years old. Shifts change, contractors rotate, and a new starter will quite reasonably assume the bottle on the trolley is fine everywhere. A one-page list sorts most of that out. For each area it should give the floor type, the approved product, the dilution and anything that must never be used there. Pin it up inside the cleaning cupboard. If it lives in a folder in the manager’s office, nobody will read it.
Then there are the machines. A dirty pad, a split squeegee blade or too much brush pressure will spoil the finish, and can damage the floor for good. Somebody needs to check and clean the equipment regularly, and it helps if that somebody has a name. Staff should also know why the method changes between a greasy kitchen, a textured entrance and a polished reception floor. People who understand the reason are far less likely to improvise when the usual product runs out.
Slips need thinking about before the first bucket is filled. Detergent film or the wrong polish cuts the grip of a floor, and a floor can look dry while it’s still damp enough to slide on. The yellow sign isn’t enough by itself, either. The Health and Safety Executive’s guidance for cleaning work says as much: signs and cones warn people, but they don’t stop anyone walking through. HSE’s advice is to keep people off smooth wet floors with barriers or locked doors, or to clean in sections so there’s always a dry way round. Keep fire exits and emergency routes clear while you do it.
Timing matters as much as method. Mop the main corridor at quarter to twelve and the lunchtime rush walks straight through it. Do it in halves, or do it out of hours. A hotel can’t shut its front entrance for the day, but it can send guests through a side door while the lobby dries. Supermarkets and hospitals have traffic and hygiene rules of their own, and the cleaning plan has to be written round those.
How often should a commercial floor be deep cleaned? There’s no standard answer, I’m afraid. A busy takeaway kitchen and a quiet office washroom might both be tiled, and they have nothing else in common. Go by how fast the floor gets dirty, how it looks, how it feels underfoot and what the flooring supplier recommends. A simple log helps you spot a problem that keeps coming back, and it tells the next shift a bit more than “the floor looked fine yesterday”.
Five lines will do: the area, the tile type if it’s known, the method used, any big spill or damage noticed, and whether somebody needs to follow it up. If a floor starts to feel different underfoot even though it’s being cleaned correctly, report it. Don’t quietly switch to another chemical. The supervisor can then look into it and arrange a slip test if one’s needed.
How To Correct The Problem Without Making It Worse
So the floor looks worse than it did before you cleaned it. Don’t reach for something stronger just yet. A second mistake on top of the first is much harder to put right.
Begin by stopping whatever you think caused the trouble, whether that’s a product or a tool. Let the floor dry and have a close look at it. Are the tiles and joints solid? Can you see a sticky film, dirt packed into the grout lines, a dull patch that won’t budge, or places where grout is actually missing? Dig out the paperwork for the tiles, and for any sealer, if you still have it. If the floor is natural stone and you aren’t sure what kind, get a specialist’s opinion before you try another chemical on it.
Next, vacuum up the loose grit. Pick a small patch out of sight, a tile or two behind a door will do, and clean it with a product you know suits the surface. Mix it at the dilution on the label and leave it for the contact time on the label. Work it gently with a soft brush if it needs help. Then rinse with clean water and a clean mop or cloth, without flooding the area. Use one product only. Mixing two to give the test more power is how people get hurt.
Let the patch dry completely, then look at it in the same light as the rest of the floor. If the cloudiness has gone or the grime has lifted, and the colour and texture are unchanged, you’ve learned what the problem was and how to fix it. If grout comes away, the finish looks patchier or the joint stays damp and soft, stop there and get it assessed.
On a larger commercial floor, plan the test like any other wet work. Barrier the area off, keep another route open and check the floor is dry and safe before the barriers come down. The test has worked when the floor is clean, has kept the finish it was meant to have and still grips underfoot.
Where A Professional Clean Makes More Sense
Most dirty tiles don’t need a professional. Everyday dirt on a sound floor that you know well will come off with the right cleaner, measured properly, and clean equipment.
Three things change the picture. The grout has years of traffic dirt in it. The tile has a texture that holds dirt where a mop can’t reach. Or you’ve rinsed carefully more than once and nothing has changed. Big commercial floors bring practical problems on top, such as needing trained machine operators, proper water recovery and some way of keeping sections closed while they dry. And with natural stone, unknown coatings or expensive decorative tiles, a wrong guess may be impossible to undo.
A good contractor starts by looking at the floor. Be wary of anyone who opens by telling you that one powerful machine cleans everything. They should identify the tile and the grout, note any damage that’s already there, check for sealers and clean a test patch before they commit to a method.
The right product goes down at the right strength, it’s agitated enough to loosen the dirt, and then the dirty liquid is taken off the floor. Some surfaces suit hot-water extraction under pressure. Others need something far gentler. And if there are loose tiles, failing grout or signs of water getting in, a decent contractor will send you to a tiler first and won’t promise that a wash will sort it out.
When you’re comparing services, ask three questions. What happens to the dirty water? How did you match the product to my floor? How long until we can walk on it? If it’s for a business, ask as well how customers and staff will be kept off the wet areas. You’ll learn more from the answers than from any glossy before-and-after photo.
If your own careful attempt has gone as far as it can, a professional test clean is a sensible next step. It shows you what the floor can realistically come back to before you pay to have the whole lot done.
The Maintenance Habits That Protect The Result
Small habits keep a floor presentable. The heroic weekend scrub, on the whole, doesn’t. Get the grit up before it’s walked across the tiles. Wipe spills when they happen, with a cleaner that suits both the floor and the spill. Wash your mop heads and brushes, since a dirty mop only puts dirt back down. Measure the detergent, and skip the hopeful extra splash.
Keep an eye on the places that go first: joints where water pools, the tiles just inside the door, and any patch that has started to look dull or feel different underfoot. Before a new sealer or polish goes onto a treated floor, find out what’s already there. In larger premises, and in rented properties where the person responsible keeps changing, a short maintenance record saves a great deal of guesswork.
How often you clean should follow how the floor is used. A tiled landing that nobody crosses in outdoor shoes can go a good while between mops. A restaurant service corridor can’t get through a single shift. And a wet week brings far more dirt through the door than a dry one, so the routine has to bend with the weather.
Perhaps the most useful habit of all is noticing when the usual method has stopped working. Grime that won’t shift may need a professional clean. Crumbling grout or damp that keeps returning needs a repair. Doing the same thing again, only harder, won’t fix either of them.
Related Floor Care Guides
All Guides →Tile & Grout Cleaning Services
Most natural and artificial stone floors start looking dirty and patchy because of the grout lines. The grout…
Steam Cleaning Vs Chemical Cleaning
Steam Cleaning Vs Chemical Cleaning For Tiles And Grout: Which Works Better? Stand in a busy café and…
Need Professional Help With Your Floors?
Call our Dublin team today or request a fast call back for expert floor deep cleaning, sealing, and diamond polishing.